Process
Step 1
Your teacher will place you in teams of three. This team will be called your "core team." Each member of your core team of will choose an expert role based on the three types of animals.
African Dwarf Frogs
Fiddler Crabs
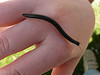
Millipedes
Fiddler Crabs
Millipedes
 |
 |
Step 2
Once you have chosen your role, your team needs to print the Animal Organizer (You only need to print one copy of the graphic organizer.) Cut the organizer into three parts and take the part that matches the animal you chose to be an expert in. Then, your core team will split up. You will need to find another student that is an expert in the same field to research with. Use the websites below to answer the questions on your graphic organizer.
African Dwarf Frogs |
Step 3
After researching your animal and completing your graphic organizer, meet with all of the experts that share your animal (African Dwarf Frog experts meet together, Fiddler Crab experts meet together, and Millipede experts meet together). Discuss your findings and note additional information to your graphic organizer if necessary.
Step 4
Now return to your core team and teach your team about your animal. All three animal experts will have their turn to teach. Your team members should take notes based on your information using the Animal T-Chart. (Each team member will need one copy.)
Step 5
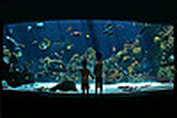
Using the knowledge gained on each animal, along with the information given to you by your teacher, your core group needs to decide which animal you will create a zoo exhibit for, and begin planning and creating your exhibit.
Create a "to-do" list:
1. Choose Your Animal
2. Decide on a Name for Your Exhibit
3. List Design Ideas for Your Exhibit
4. List Basic Facts that Visitors Need to Know About Your Animal
5. Begin Sketching Design Ideas
Remember: it should be attractive to kids, hands-on, and provide important information about your animal.
Check out these zoo websites for creative ideas:
St. Louis Zoo
Tulsa Zoo
San Diego Zoo
Washington DC Zoo
 Picture by Dan Anderson |
 Picture by Tanya Puntti |
Step 6
Finish your design. Make sure it is colored and labeled neatly. Then take a picture of it. Your picture is an important part of your project. Now, you are ready to begin working on your information. Begin to organize important information about your exhibit and your animal. Your information should describe and explain your exhibit, should tell what important facts the students will learn about your animal, and tell why your exhibit should be chosen. You can organize your presentation information in a Four-Square, in SMART Ideas, or in SMART Notebook. (Your teacher will let you know how they want you to organize your information.)
Step 7
Now that your exhibit design and the information for your presentation are complete, you are ready to combine the two into a multimedia presentation. Your teacher will guide you in this process.
Remember: organize your slides in a manner that will make sense to your audience.
Remember: organize your slides in a manner that will make sense to your audience.
Step 8
Now that your multimedia presentation is complete, you are ready to present your exhibit to the St. Louis Zoo management. Be confident and speak clearly when you present your project. Good Luck!!
